Lawn Mower Maintenance
Regular lawn mower maintenance is essential if you want a lush, healthy lawn and a reliable mower you can count on season after season.
Whether you’re a weekend warrior who finds joy in yardwork or a pro who handles dozens of properties each week, staying on top of maintenance is key. Knowing how to maintain a lawn mower not only extends its lifespan but also ensures every cut is clean and even – which is vital for the health of your lawn.
It’s the kind of attention to detail Yarders live by. Because when you take pride in your yard, you take care of your tools — and that care pays off.
Skip the upkeep, and you risk breakdowns, expensive repairs, and a yard that doesn’t reflect the effort you put into it. But the simple lawn mower maintenance tips below will help you keep things running smoothly — so your equipment works as hard as you do, season after season.
Why Lawnmower Maintenance Matters
Routine lawn mower maintenance is just as necessary for your grass as it is for your mower’s health. Regularly servicing a mower improves overall performance – neglected mowers cut unevenly, are more likely to have engine trouble, and are prone to safety hazards.
- Dull blades tear the grass instead of cleanly slicing it, making your lawn more susceptible to disease.
- Dirty air filters, dirty oil and engines with insufficient oil make the engine work harder than it should, increasing fuel consumption and promoting engine wear.
- Mowers that haven’t been taken care of often need expensive repairs and eventually need to be replaced.
A well-maintained mower can run for years, offering peak efficiency and reduced costs. Properly caring for your mower saves you time and money on repairs and fuel, and helps to protect the environment.
Finally, regular mower maintenance helps keep you – and anyone using your mower – safe by lowering the risk of malfunctions that can cause injury. 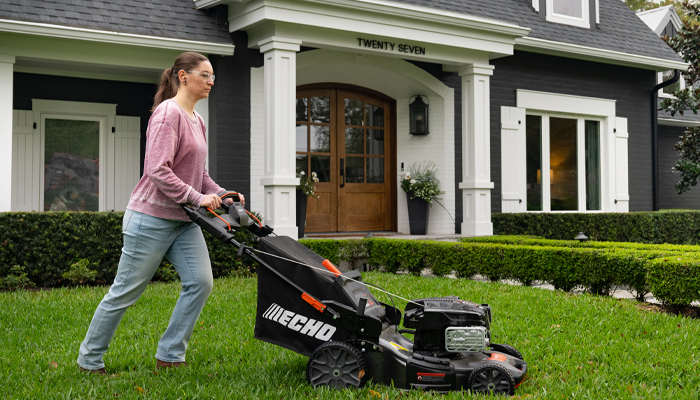
Lawnmower Maintenance Checklist
Follow this lawn mower maintenance checklist to keep your mower in top condition. Each step addresses a key aspect of mower health, from the engine to the blades and beyond.
Check and Change the Motor Oil (Gas-Powered Mowers)
Oil is the heart of your mower’s engine. Checking the oil before each use is easy – just remove the dipstick, wipe it clean, and reinsert it to recheck.
If the oil on the dipstick looks dark or gritty, it’s time to do an oil change. Most manufacturers recommend changing the oil in a lawn mower every 20 - 25 hours of use, or at least one to two times per season. If the lawn mower is equipped with a Briggs and Stratton® engine with the Just Check & Add feature, oil changes are not necessary. See your Briggs and Stratton® engine operator’s manual for additional information.
Step-by-step guide to changing the oil in your lawn mower:
- Make sure the mower is off.
- With engine off but warm, disconnect the spark plug wire and keep it away from the spark plug.
- If you drain the oil from the top oil fill tube, the fuel tank must be empty. If it is not
empty, fuel leakage can occur and cause a fire or an explosion.
Changing oil on engines with a drain plug.
- Tilt the mower back on the handle and place a drain pan underneath.
- Remove the drain plug. Center the drain opening over the drain pan and then return the mower to the normal operating position, remove the dipstick and allow the oil to drain completely.
- Reinstall the drain plug and tighten securely
- Refill with the recommended oil type and quantity per the engine manufactures specification. Check the oil level on the dipstick and top off if necessary.
Changing oil through the oil fill tube.
- When draining the oil from the top oil fill tube keep the spark plug end of the engine up. Drain the oil from the fill tube into an approved container.
- Return the mower to the normal operating position. Refill with the recommended oil type and quantity per the engine manufactures specification. Check the oil level on the dipstick and top off if necessary.
- Reconnect the spark plug wire.
NOTE: Dispose of old oil at a recycling center.
*Never pour oil down the drain, on the ground, or into a storm drain.
Clean and Replace the Air Filter (Gas-Powered Mowers)
If you use a gas-powered mower, you’ll need to clean and occasionally replace the air filter. Clogged air filters restrict airflow, affecting engine performance.
Most mowers use either a foam or paper filter. Some models may have an optional foam pre-cleaner over the paper filter that can be cleaned and used again.
Note: Do not use pressurized air or solvents to clean the filter. Pressurized air could result in damage to the filter and solvents will dissolve the filter.
Step-by-step guide to cleaning or replacing your lawn mower’s air filter:
- Make sure the mower is off and the engine is completely cool.
- Disconnect the spark plug wire for safety.
- Find and remove the air filter cover – it’s usually on the side of the engine.
- Remove the filter(s).
Foam filters:
- Clean the foam filter in liquid detergent and water. Squeeze the foam element with your hands in a clean cloth until it is dry.
- Apply clean engine oil on the foam element. Place the filter in a plastic bag and squeeze the filter several times until the oil is distributed evenly. To remove unwanted engine oil from the foam element, squeeze it with your hands in a clean cloth.
- Install the foam element back into the air filter base and install the air filter cover.
- Make sure that the fastener(s) is tight.
Foam Pre-filters:
- Clean the pre-cleaner the same as standard foam filters.
- Do not add oil to the pre-filter on this style filter.
Paper filters:
- Gently tap the filter to remove loose dirt or clean with a soft bristle brush.
- Replace the filter if it’s heavily soiled or damaged.
*NOTE: Replace the filter annually or as directed by the manufacturer.
- Reinstall the cleaned or new filter.
- Install the air filter cover and make sure that the fastener(s) is tight.
- Reconnect the spark plug wire when finished.
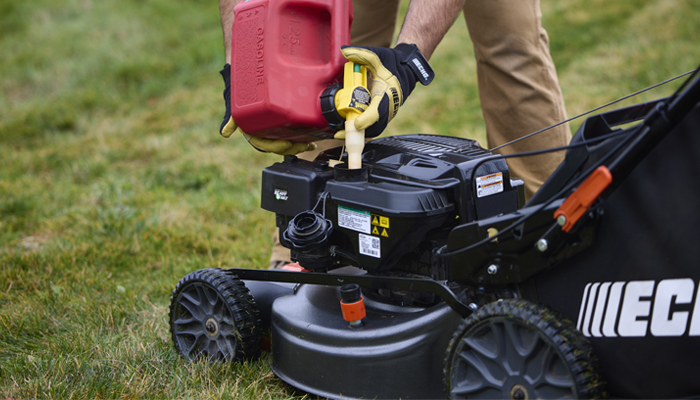
Treat and Stabilize Fuel (Gas-Powered Mowers)
Always use fresh, clean gasoline with the recommended octane rating of 87 (Regular gas) or higher. Gasoline with up to 10% ethanol (gasohol) is permitted.
Stale fuel is one of the leading causes of engine problems, especially after off-season storage. It only takes 30 days for gasoline to start degrading. As the fuel degrades further varnishes and gums will form, resulting in the unit being difficult to start and expensive carburetor repairs. To minimize this problem add a fuel stabilizer to fresh gasoline every time it’s purchased at the pump. Adding a fuel stabilizer to untreated gas in your mower will not revitalize this fuel and protect the engine from starting and carburetor problems.
If gasoline in the engine has not been treated with a fuel stabilizer, it must be drained into an approved container or run the engine until it is out of fuel.
Proper fuel handling will help prevent gum and varnish buildup and costly carburetor and fuel system service.
Inspect and Change Sparkplugs (Gas-Powered Mowers)
Spark plugs are crucial for reliable engine ignition. A worn-out, cracked, or dirty spark plug can cause hard starts, rough running, and lack of power. Inspect and replace the spark plug annually (or more often if you notice performance issues, mow frequently, or care for larger spaces). Spark plugs should never be cleaned.
Step-by-step guide to replace spark plugs:
- Make sure the mower is off, and the engine is completely cool.
- Disconnect the spark plug wire.
- Use a brush or rag to clean around the plug and prevent debris from entering the engine.
- Remove the plug with a spark plug socket.
- Inspect for heavy buildup or deposits, cracks, signs of wear, or worn electrodes.
NOTE: If the spark plug is very dirty or worn, it’s time to replace it.
- Use a feeler gauge to check and adjust the electrode gap as specified in your owner’s manual.
- Install the new plug and tighten the spark plug to the correct torque and reconnect the lead.
Maintenance for Battery Powered Mowers
Battery-powered mowers have become increasingly popular in recent years. Homeowners love their quiet operation and low emissions. While they do require less engine upkeep, regular care is still needed to keep them in top condition.
Best practices for battery care:
- Always remove the battery from your mower after each use, before cleaning or storing it when the season is over.
- Store batteries indoors in a cool, dry place – avoid moisture or extreme temperatures.
- Only charge batteries with the manufacturer’s recommended charger.
- Do not overcharge.
- Unplug the charger when the battery is fully charged – don’t leave the battery on the charger for extended periods.
- Keeping batteries at about 50% charge is ideal for long-term storage – recharge every few months.
General Maintenance & Cleaning Tips for All Lawn Mowers
After every mow, remove grass clippings and debris from the mower deck and undercarriage. Grass buildup can limit airflow, affecting cutting performance and promotes rust and corrosion.
Use a scraper or brush to remove caked-on debris. You can also hose down the deck occasionally if you notice your mower is exceptionally dirty.
Never expose battery powered lawnmowers and batteries to water, rain or wet conditions. Water entering the electrical components will result in component failures, increase the risk of electric shock and cause potential battery fires.
Keep all engine and motor cooling air inlets clear of debris. Blocked air inlets and debris may result in overheating or risk of fire.
For off-season storage:
- Clean the entire mower thoroughly
- Drain or stabilize the fuel (if applicable)
- Remove the battery (if applicable)
- Store in a dry location indoors. Never store gasoline or battery powered mowers inside your home.
Sharpen and Balance the Blades
Sharp blades offer a clean, healthy cut. Dull blades can tear your grass, leaving ragged edges that brown quickly and are more susceptible to disease.
At least once a season or every 20 - 25 hours of use, detach the blade from your mower and sharpen it with a file or grinder. After sharpening, check the balance by placing the blade on a balancer or hanging it on a nail through the center hole. If one side dips, the blade isn’t balanced. Carefully remove more material on the heavier side until the mower blade is level. Balanced blades reduce vibration, preventing wear on the mower’s bearings and engine.
Learn more about how to sharpen your mower’s blades.
Keep Your Lawn Mower Working Like a Pro
Consistent maintenance ensures you have a long-lasting, high-performing lawn mower. Use our lawn mower maintenance checklist as a guide: check the oil and filters, treat the fuel, inspect spark plugs, sharpen blades, and clean the mower regularly to ensure it starts when you need it, cuts cleanly, and lasts for years to come.
Pro Tip: Keep a maintenance log and track what you do and when you do it. Always consult your owner’s manual for recommendations specific to your mower.
Ready to extend your mower’s cutting power and enhance its performance? Visit the ECHO ECHO Mower Blade page to keep your equipment running like new.