How to Mulch Your Yard
Mulching your yard offers many benefits, both aesthetically and for the health of your outdoor space. From moisture retention to weed suppression to curb appeal, learning how to mulch your yard pays off. While the yard mulching process itself is relatively simple, there are a few key tips and tricks that will ensure you get the most out of your efforts. For example, it’s worth investing in high-quality mulch. And the right tools make your job easier, faster, and can save you money (a chipper/shredder lets you create your own eco-friendly mulch from yard debris).
Read on to learn everything you need to know about mulching a yard. We’re covering all the basics, from when to do it to how to choose the best mulch to what tools you need before you start. We’re giving you a step-by-step guide on how to mulch.
When to Spread Mulch: Choosing the Right Time for Best Results
There are different times of year when mulching offers distinct benefits. Depending on your needs, the “best” season for mulching can vary. Mulching your yard in the spring can help with moisture retention and weed prevention. In the fall, adding mulch to your beds or around trees helps insulate soil against harsh winter weather that can damage root systems.
The best times to spread mulch are typically mid-to-late spring through fall. The following tips and common mistakes help ensure optimal results.
- Wait for the soil to warm in the spring: Don’t mulch too early, or the ground might not be warm enough for emerging plants to sprout and thrive.
- Mulching in late spring: Late spring applications can help suppress weeds and support new growth. It also keeps moisture in the ground after seasonal rains. Make sure to wait for the ground to thaw.
- Mulching in the fall: If you’re planning to spread mulch in the fall, do so before the first freeze. Depending on what zone you live in, late September through November is generally a good range. This helps insulate plant roots to protect against the harsh temperatures of winter. Don’t spread mulch after the first hard freeze of the season.
- Apply to moist soil: Watering your beds before mulching helps lock in moisture. While it’s true that mulch helps retain moisture, it won’t rehydrate dry soil.
- Weed and prune first: Prepare your beds by weeding and removing dead plant material before laying mulch. This reduces competition and keeps your beds looking nicer longer.
Mistakes to avoid:
- Don’t pile mulch directly against tree trunks or stems. Leave at least a 1-inch gap to prevent rot and pest issues.
- Apply 2 to 4 inches of mulch—any less won’t help suppress weeds, and more can promote fungus and suffocate your root systems.
- Watch for emerging seedlings. It’s best to wait until returning plants have sprouted and are established so you don’t stunt new growth.
- Only renew as needed. It’s OK to top off mulch each year or completely replace it if it’s decomposed. However, don’t add more than 2 to 4 total inches.
- Watch the weather. Mulching in high wind promotes drift and can create a messy cleanup.
Choosing the Right Mulch for Your Yard
There are different types of mulch to choose from. Depending on your preference, you may opt for organic over inorganic mulch. You also have options for various materials and colors.
Organic mulch is made from natural materials and breaks down over time, adding nutrients to your soil.
Types of organic mulches include:
- Wood chips and bark
- Pine bark or nuggets
- Shredded hardwood bark
- Pineneedles
- Straw
- Leaves and grass clippings
- Compost
- Straw or hay
Inorganic mulch is human-made or from non-living materials that don’t break down as easily. It won’t improve soil health, but can be a good option if you’re looking for lasting weed suppression.
Types of inorganic mulch include:
- Rubber mulch
- Landscape fabric or plastic sheeting
- Gravel, stones, rock
Mulch color options:
- Brown
- Red
- Black
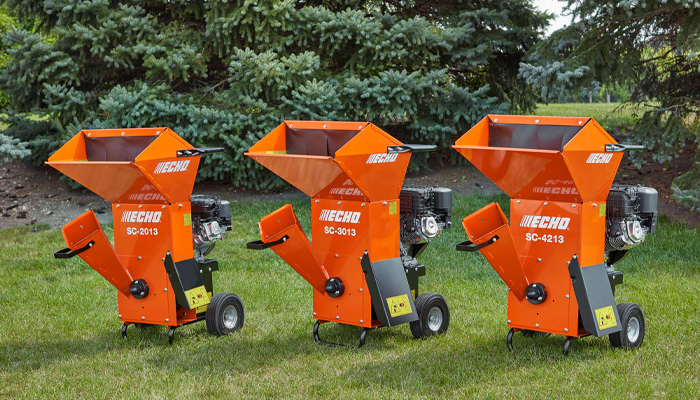
Calling all Yarders — DIY mulch is a snap with your ECHO chipper/shredder. Turn downed branches and clippings into wood chips and mulch that’s perfect (and cost-effective) for flower beds and landscaping.
Tools and Materials Needed for Mulching
While the process is straightforward, having the right tools can make your mulching project significantly easier. Here’s what you want to have on hand:
- Chipper/shredder to make your own mulch
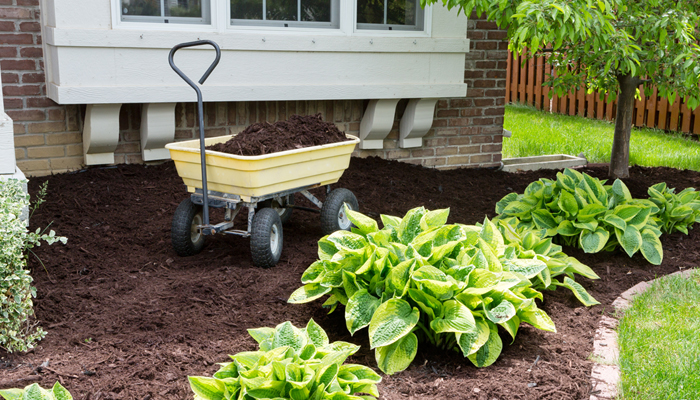
- A wheelbarrow or garden cart to transport heavy piles of mulch to the area you’re spreading
- Shovel or pitchfork to move and spread mulch from piles
- A bow rake or a landscape rake to spread a uniform layer
- Gardening gloves to protect your hands from splinters, thorns, or dyed mulch if that’s what you’re using
- An edger or spade to define your garden beds so mulch stays put
- Yard waste bags or a tarp to collect and remove any old mulch or debris before you apply the fresh layer
How to estimate how much mulch you’ll need:
- You want your mulch to be 2 to 4 inches deep.
- One cubic yard of mulch covers approximately 100 square feet at a 3-inch depth.
- To calculate: Measure the length and width of your area and multiply them to get your total square footage. Divide by 100 to determine the number of cubic yards of mulch you need.
How to Mulch Your Yard: Step-by-Step Guide
Before your next mulching project, consider investing in an ECHO chipper/shredder to make your own mulch from old yard debris. You’ll save money and keep materials out of the landfills, and making your own mulch also lets you control the freshness and composition of what you’re using in your yard.
Prepare the Mulch Bed
To prepare your beds, first remove any weeds, leaves, or old mulch you’re replacing. Using a spade or edger, define the border of your beds so mulch doesn’t wash out onto paths or spill into your lawn. Use a garden fork or rake to loosen compacted soil, allowing moisture to be absorbed underneath the mulch.
Transporting and Positioning the Mulch
Load your mulch into a wheelbarrow or garden cart. Move small piles at a time to the areas you’re mulching. Keeping loads small makes them more manageable, avoiding mess and fatigue.
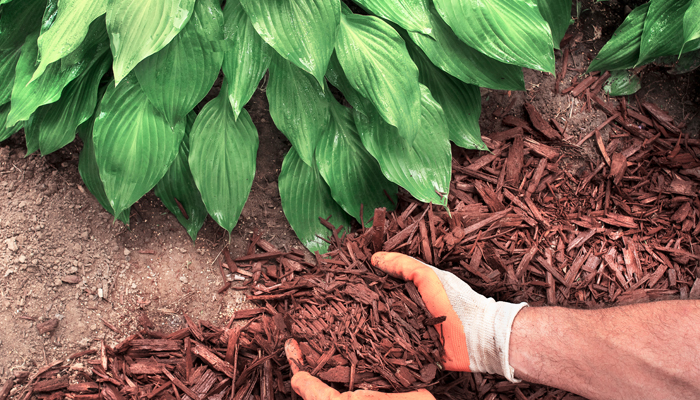
Apply Mulch Evenly to the Bed
Using a shovel, pitchfork, or your hands, gently place the mulch around your plantings or trees. Ensure that you cover areas evenly and avoid creating large piles to prevent suffocating the underlying plants.
Working Mulch Around Existing Plants & Trees
Don’t pile mulch directly against tree trunks or the stems of plants. There should be at least a 1-inch gap to prevent moisture from building up and to avoid rot or pest infestations. If you’re mulching around trees, create a donut-shaped ring, not a tall mound, to ensure the tree’s root system stays healthy.
Evening Out and Checking Mulch Depth
After spreading your mulch, use a rake to smooth each layer. Check the thickness by hand or with a ruler to ensure you have a depth of 2 to 4 inches.
Final Touches and Letting the Mulch Settle
After you finish laying your mulch, clean up anything that’s spilled outside your beds onto walkways or lawns. Lightly watering your new mulch will help it settle and keep it from scattering in the wind. If you used dyed mulch, don’t water heavily for the first 24 to 48 hours to prevent runoff and staining.
Maintaining Your Mulch Beds
Taking care of your mulch helps your yard look great for the entire season. Use the following tips when maintaining your mulch beds:
- Rake and fluff your mulch a few times throughout the season to prevent matting and to brighten color.
- Replenish, top off, or replace mulch every year or as needed. You may need to do it more frequently if you use an organic mulch that’s decomposing.
- Check for mold or fungus, which is more likely to occur if your mulch is too thick or doesn’t drain well.
- Thin out clumps as needed.
- Inspect bed edges to ensure mulch isn’t spilling out.
- Check the moisture of your soil by feeling underneath the mulch and adjusting your watering as needed.
- Promptly remove weeds.
Mulching your yard can transform it. Mulch offers weed suppression and helps to conserve soil moisture while boosting your home’s curb appeal. Be sure to choose the best mulch for your specific needs, preferences, and landscape type to achieve results that you’ll love all season long.
For homeowners seeking efficiency and sustainability, the ECHO chipper/shredder will save you trips to the store and let you reduce, reuse, and recycle. Explore our chipper/shredder lineup today for fast and reliable yard maintenance.